The Webflow SEO Checklist We Run Before Every Website Goes Live!

You’ve poured weeks into planning, designing, and developing a drop-dead gorgeous website in Webflow. The typography is dialed in. The interactions are as smooth as partially-melted butter. Your brand identity is dripping off every component. The messaging was designed to resonate with your target audience. Now, you’re ready to hit “Publish” and reveal this work of labor, love, and art to the rest of the world…(insert vinyl record skipping sound here)
Not so fast!
It really doesn’t matter how sexy and polished your website is if nobody knows it even exists. At that point, it’s just a really expensive digital brochure floating around in cyberspace somewhere. We’ve seen it happen: a client comes to us after dropping thousands of dollars into a website that looks incredible and functions well enough to serve its audience but is practically invisible to search engines. No indexing. No meta descriptions. Images that would fit on the side of a building being served to a device that fits in your pocket.
It’s painful.
We’ve built enough websites to know exactly where things tend to go wrong, and it’s almost always right before launch. That’s why we have developed a comprehensive SEO checklist that we run on every single project before it gets pushed out into the internet. This isn’t just theory and it isn’t just a clickbait title designed to generate an event in Google Analytics. This is the exact process we follow, right from the jump, to ensure that your website investment actually pays off with real traffic and real leads that turn into real conversions for your business.
This is our cheat sheet. Whether you’re a business owner trying to keep your agency accountable, or a fellow Webflow designer who wants to be sure you’re not leaving any rankings on the table, this article is for you.
1. Indexing & Crawlability

This is the foundation for the rest of this checklist. If search engines can’t crawl and index your website, then the rest of this list is pointless. It would be the equivalent of building a storefront in a densely populated downtown market district but forgetting to ever unlock and open the door to let people in to do business.
Here is the list of things that we look at before launching a new website:
- Disable the ‘your-website.webflow.io’ staging domain from indexing: This is a commonly missed step in Webflow. If your staging subdomain gets indexed, you’re looking at coming out of the gate with duplicate content issues that will confuse search engines and dilute your rankings. Head over to your Site Settings → SEO and make sure the checkbox to enable indexing on your webflow.io domain is turned off.
- Set the default domain: We strongly recommend using the ‘www’ version as the default domain. Not setting a default domain can potentially cause duplicate content issues that can hurt your rankings. A worst-case scenario could see pages getting de-indexed entirely. Pick one and stick with it. Go to Site Settings → Publishing and ensure your ‘www’ domain is the default.
- Configure robots.txt: The robots.txt file is what tells a search engine what pages the crawlers can access on your website. Webflow automatically includes your sitemap URL in the robots.txt file, but you should still review it to ensure you’re not accidentally blocking pages that you want to be indexed. You can edit this in Site Settings → SEO. Visit this link to learn more about the robots.txt file.
- Verify the XML sitemap is generating correctly: Webflow automatically generates a sitemap every time you publish your website (if you have that feature turned on in your Site Settings), but you’d be surprised how often CMS collection pages or utility pages like 404s slip through the cracks, creating side effects you don’t want to create. After you have published your website, visit yourdomain.com/sitemap.xml to ensure everything that should be there is, and everything that shouldn’t be there isn’t.
- Check for noindex tags on pages you want to be ranked: Every static page and CMS template in Webflow has an option to exclude it from search engine results. Visit the page setting for every page of your website and verify that all of your important pages that need to be indexed have the Sitemap indexing setting turned on. Not taking the time to do this could result in some of your pages not being crawled by search engines, and you don’t really want that, and it happens more often that you’d think it does.
2. Meta Titles & Descriptions
Meta titles and descriptions are the first impression your website makes within search results. They are the headline and the elevator pitch that will convince someone to click on your link instead of the other nine links on the page. If you don’t take the time to write them, Google will, and Google isn’t the copywriter you want to have on your team.
Here’s the list of things to check to ensure your metadata is up to snuff:
- Write unique title tags for EVERY page: This is non-negotiable. Keep them under 60 characters so they don’t get truncated in search results, but don’t make them short or vague. The title tag of a page should include the primary keyword you are targeting for that page and clearly communicate what the page is about. Avoid using titles like “Home” or “Services”. For example, a web design service page might read, “Custom Web Design in Joplin, MO | Storm Cloud Marketing”. That title immediately tells the reader three important things: who, what, and where.
- Write compelling meta descriptions for EVERY page: This is also non-negotiable. Descriptions should be around 150-160 characters. include all of the relevant keywords you are targeting, and give users a reason to click the blue link. Think of a meta description as a miniature advertisement for that page. Webflow makes this easy. Head to the page settings and scroll down to the SEO section. They even give you a convenient preview so you can see what it will look like in search results.
- Set the Open Graph image and tags for EVERY page: When someone shares your web page on Facebook, X, LinkedIn, or a messaging app, Open Graph tags control what image, title, and description appear in the preview. These settings can be found right below the SEO settings for every page and you will also get a preview of what they will look like. Don’t leave these setting blank. A page shared on social without an OG image looks unprofessional and will likely not get many clicks. Be sure each page has a unique Open Graph image. Your homepage preview should not look like your pricing page preview.
- Don’t forget to check your CMS collection pages: If you have a blog or any sort of page that relies on dynamic collections, make sure your template page is pulling in dynamic meta titles and descriptions from your CMS fields. A common mistake is having every blog post showing the same generic metadata and we can mitigate that by ensuring titles and descriptions are being driven by real collection data.
3. URL Structure
Having clean, descriptive, and memorable URLs are one of the easiest and simple SEO wins you can obtain. They’re also one of the easiest things to mess up if you’re not paying attention. Here is what we recommend taking a look at:
- Keep slugs short, descriptive, and keyword-rich: A slug is all of the information that is appended to the end of your domain name and tells the server what page your browser is trying to access. A few things to keep in mind are: aim for no more than 3-5 words and use hyphens (-) to separate words instead of underscores (). A good URL slug looks like /services/web-design. A bad URL slug looks like /services/webdesignanddevelopment_servicespage. The shorter and cleaner your slugs are, the easier it will be for both search engines and humans to parse them.
- Remove ‘stop words’ and unnecessary filler: Words such as “and”, “the”, “of”, and “a” just add noise to your URLs. Just cut them out and keep it concise. Only use stop words when it doesn’t make sense to not include them.
- Establish a logical hierarchy and structure: Your URL structure and sitemap should reflect your website’s information architecture. If you have a ‘Services’ section on your website with individual service pages nested underneath, your URL slugs should reflect that: /services/web-design, /services/video-production, /services/graphic-design. Doing this helps search engines understand the relationships between all of your pages and will distribute link equity more effectively.
- Set up 301 redirects for any changed URLs: If you are launching a redesign or migrating from a different platform, this is absolutely critical. Every single URL from the old website that has been altered or removed must have a 301 redirect pointing to the new equivalent URL. Broken links are not only frustrating for your visitors, they also completely tank your SEO. Webflow handles redirects natively within Site Settings → Publishing and even has a handy feature that will allow you to upload a CSV file containing all of your redirects and import them for you. Having once handled a migration from WordPress to Webflow that involved 843 blog posts, I can tell you from experience: You do NOT want to miss this step!
4. Heading Structure & Semantic HTML
This is one of those steps where a lot of designers will get tripped up on because they’re thinking visually rather than structurally. Just because a piece of text looks like a heading doesn’t mean search engines will treat it like one. Here are some suggestions for mitigating this:
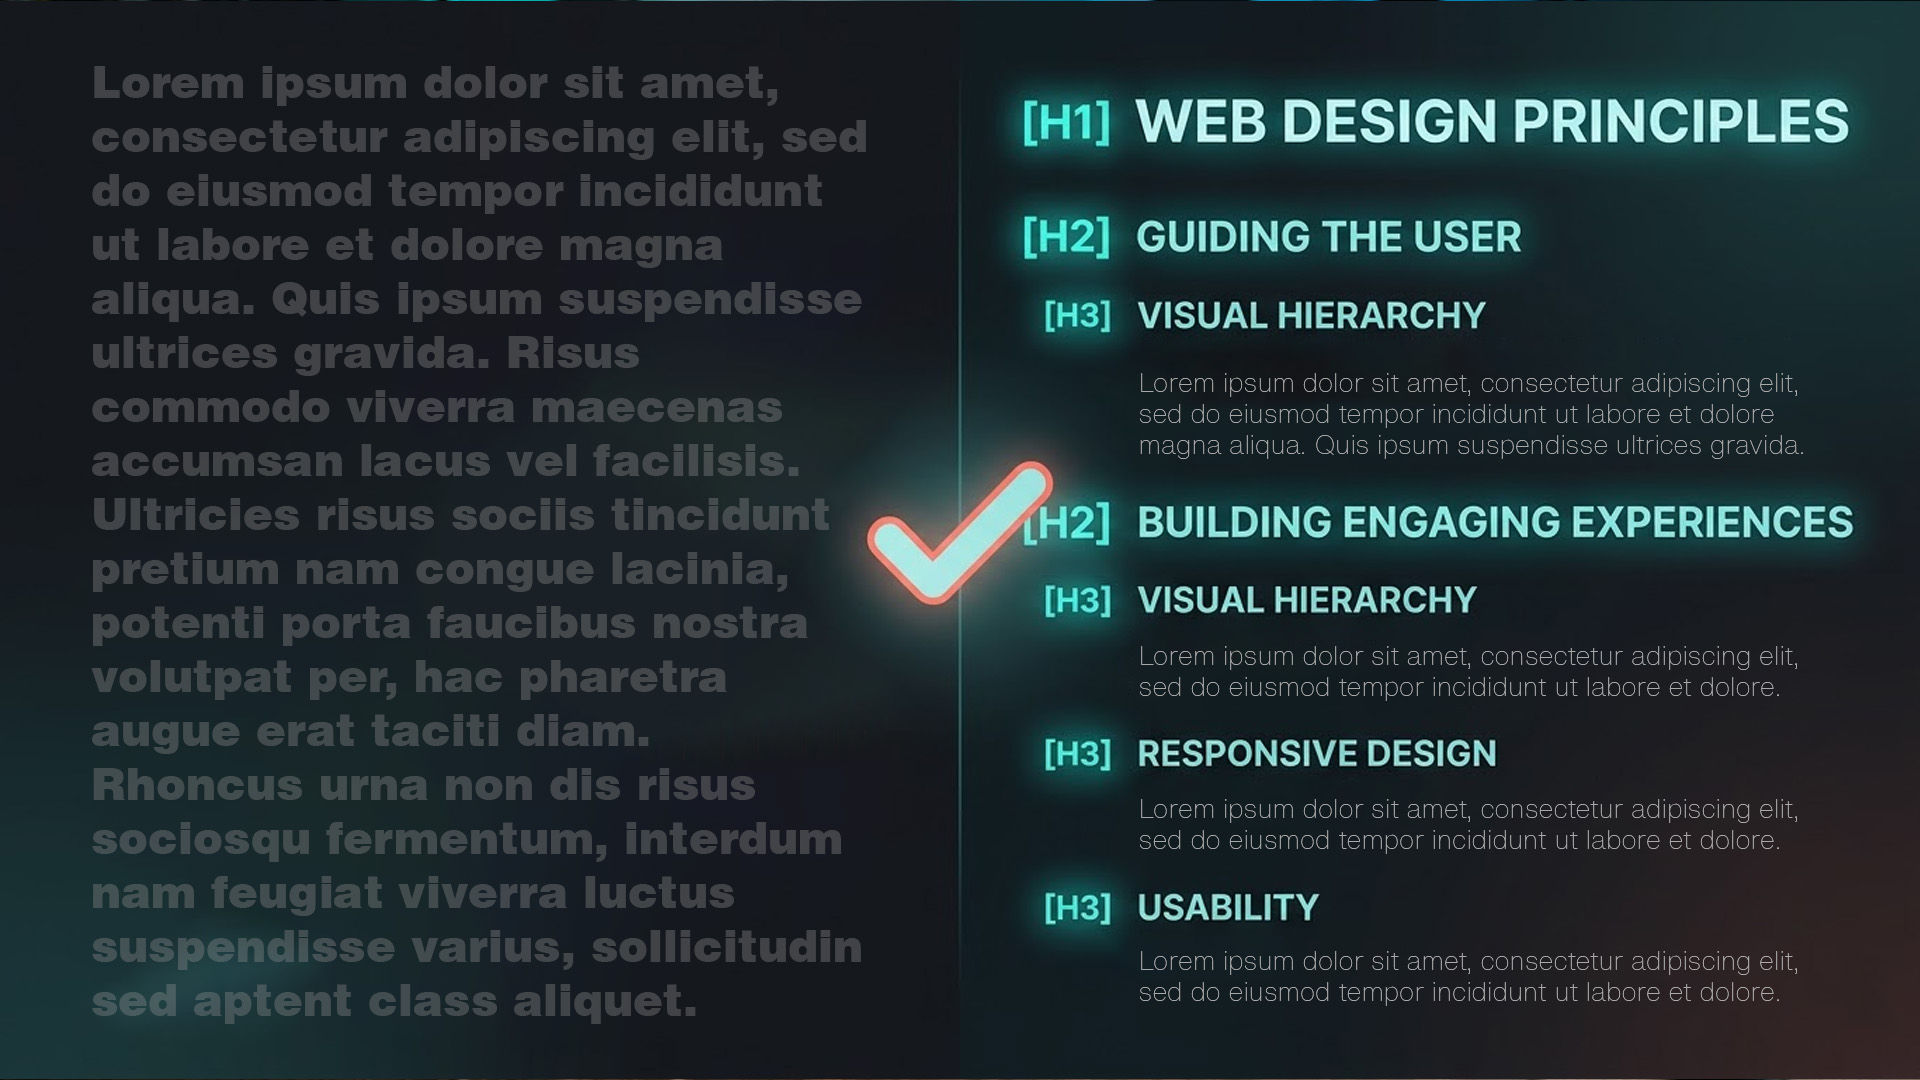
- Use one H1 tag per page: There can be only one. Highlander jokes aside, your H1 element is the main title of the page and should always include you primary keyword in it. In Webflow, make sure you are actually using a proper heading tag and not using a paragraph styled to look bigger. Styling a standard text block to look like a heading without setting the actual correct tag does absolutely nothing for SEO.
- Follow a logical heading hierarchy: Heading elements are designed to give structure to a piece of content. This means one H1 for the main page title, followed by H2 tags for each major section of the page, and H3 elements for subsections within those major sections. Don’t skip heading levels (like jumping from H1 to H4 without an H2 or H3 in between) and don’t just use headings because you like the way they look. These are meant to inform search engines about the structure and hierarchy of your content.
- Use Webflow’s semantic HTML elements: Webflow gives us access to semantic tags like <header>, <nav>, <main>, <article>, <section>, and <footer> directly in the Designer. When you are adding sections, containers, or div blocks, use the Tag dropdown in the Element Settings panel to assign the correct HTML tag. Doing this improves accessibility, helps screen readers navigate your content, and provides search engines with more context about what each part of your page is for.
5. Image Optimization
Images are one of the biggest factors in how fast (or slow) your website loads into the browser. In 2026, Google’s Core Web Vitals are a direct ranking factor. This means your images are not just affecting user experience, they are affecting where you show up in search results. Here is what you can do to ease the burden your images are causing for load times:
- Compress every single image BEFORE uploading: There is no reason you need to have a 4K, 12MB hero image on the homepage of your website. Tools like TinyJPG, Squoosh, or even just exporting with the right quality settings from Photoshop can reduce file sizes by 60-80% with virtually no quality loos or degradation. A good baseline is: 200KB and under for hero images and 100KB or lower for all other images.
- Use modern image formats: Formats such as WebP and AVIF deliver significantly smaller file sizes than traditional JPEG or PNG at a comparable quality. Webflow has a compression feature hidden in the Assets panel within the Designer that will take the image assets you have selected and compress them into WebP/AVIF format automatically for you.
- Set explicit width and height attributes on your images: You know that annoying phenomenon where the content on a website shifts around as images are loaded in? That is called Cumulative Layout Shift (CLS). Google doesn’t like it and neither do your users. When your browser understands the dimensions of an image before it is loaded, it can reserve the correct amount of space on the page so that when it finishes loading nothing gets moved out of the way to accommodate it. Make sure you are setting defined sizes on your image containers rather than relying solely on auto-sizing.
- Enable lazy loading for images that load below the fold: There are two areas of a webpage that matter for this: above the fold and below the fold. Above the fold is everything that will be visible inside the browser window before the user scrolls. Below the fold is everything after that. You obviously want everything above the fold to load immediately (or close to it). Everything else can be loaded in as the content is about to be visible in the browser. Webflow has native lazy-load option for image elements. Set that for everything below the fold and it will significantly improve your Largest Contentful Paint (LCP) score in Core Web Vitals by prioritizing the content your visitors see first.
- Write descriptive ‘alt’ text for EVERY image: Alt text serves two purposes: it improves accessibility for visually impaired users using screen readers, and it helps search engines understand what the image is all about. Describe the purpose of the image, not just its appearance or content. Instead of a basic “team photo”, write something like “Storm Cloud Marketing team reviewing website design mockups in their office in Downtown Joplin, Missouri.” Just keep it under 125 characters and include relevant keywords where they fit naturally.
6. Speed & Core Web Vitals

Google's Core Web Vitals are three metrics that measure loading speed, visual stability, and responsiveness. In 2026, they serve as a direct ranking factor, and they're often the tiebreaker between competing pages with similar content quality.
The three metrics you need to care about:
Largest Contentful Paint (LCP) measures how long it takes for the largest visible element on your page to load. Google wants this under 2.5 seconds, but top-performing Webflow sites hit under 1.8 seconds. The biggest culprits for slow LCP are unoptimized hero images, heavy background videos, and render-blocking scripts.
Cumulative Layout Shift (CLS) measures how much your content shifts around during loading. A score below 0.1 is considered good. The fix? Explicit dimensions on images and video embeds, avoiding late-loading banners that push content around, and using CSS transforms instead of layout-changing properties for animations.
Interaction to Next Paint (INP) replaced First Input Delay in 2024 and measures how quickly your site responds to user interactions like clicks and taps throughout the entire page lifecycle. Keep it under 200 milliseconds. Reduce third-party scripts, defer non-critical JavaScript, and avoid heavy custom code that bogs down the main thread.
Here's what we do in Webflow specifically:
- Enable minification. In the Webflow Designer, click Publish and enable all the advanced options for minifying HTML, CSS, and JavaScript. This is a free speed boost that takes two seconds to turn on and there's no reason not to.
- Audit third-party scripts. Every analytics tag, chatbot widget, tracking pixel, and marketing automation script you embed in custom code adds weight to your page. Audit them. If it's not actively providing value, remove it. If it is, make sure it's loading asynchronously or deferred so it doesn't block the rest of your page from rendering.
- Upload fonts manually. Rather than loading Google Fonts from an external CDN, download the font files and upload them directly in Webflow's Project Settings > Fonts tab. This eliminates an external request and gives you more control over how fonts load, reducing the likelihood of layout shifts caused by font swapping.
- Test on real devices. Don't just rely on Lighthouse scores in Chrome DevTools. Google uses real-user field data from the Chrome User Experience Report (CrUX) to make ranking decisions. Test your site on actual iPhones and Android devices on real cellular networks to get an honest picture of how it performs in the wild.
7. Google Search Console Setup
Google Search Console is how you communicate directly with Google about your website. If you skip this step, you're essentially launching a website and hoping Google figures it out on its own.
- Verify your domain in Search Console: Do this before launch if possible. We prefer DNS-based verification for Webflow sites since it covers the entire domain, including all subdomains and URL variations. Webflow also supports the HTML meta tag method. Just drop the verification code into Project Settings → Custom Code → Head code.
- Submit your sitemap: Once your site is live, submit your sitemap URL (yourdomain.com/sitemap.xml) to Search Console. This tells Google exactly where to find all of your indexable pages and speeds up the crawling process.
- Request indexing on your most important pages: Use the URL Inspection tool in Search Console to manually submit your homepage, key service pages, and any high-priority content. This doesn't guarantee immediate indexing, but it puts you at the front of the line.
- Check for crawl errors: Within the first few days after launch, monitor the Coverage report in Search Console for any errors, warnings, or pages that were excluded from indexing. Fix issues immediately — a clean launch means a clean crawl.
- Monitor Core Web Vitals in Search Console: The Core Web Vitals report groups your pages into "Good," "Needs Improvement," and "Poor" based on real-user data. This is the data Google actually uses for ranking, so it's more important than any lab test you can run.
8. BONUS: Set Up Your llms.txt File

This one is a forward-looking step that most agencies aren't even thinking about yet, but if you read my article on AI visibility, you know this matters.
AI-powered search tools like ChatGPT, Claude, Perplexity, and Google's AI Overviews are rapidly changing how people discover content. An llms.txt file is essentially a sitemap for large language models. This is a structured, plain-text file hosted at the root of your domain that gives AI systems a curated overview of your site's most important content.
Think of it like robots.txt was in its early days. It's experimental, it's not universally adopted yet, but the businesses that set it up now are positioning themselves ahead of the curve. Webflow now supports native llms.txt hosting for sites on CMS or Business plans. You can upload the file directly in Site Settings > SEO.
Here's the basic structure:
# Your Company Name

> A clear, one-sentence description of what your company does.

## Main Pages
- [Service Name](https://www.yourdomain.com/services/service-name): Brief description of this service.
- [About Us](https://www.yourdomain.com/about): Brief description.

## Blog / Resources
- [Article Title](https://www.yourdomain.com/articles/article-slug): Brief description.
Write it like you're explaining your business to someone who has never seen your website before but needs to describe it accurately to someone else. Skip the marketing jargon and just say what you actually do.
The Bottom Line
SEO isn't an afterthought. It's a launch requirement. A website without proper SEO is like a billboard in the middle of a tropical rain forest. It might be beautiful, but nobody's going to see it.
Every item on this checklist exists because we've either seen it missed on a project that came to us for help, or because we've watched it directly impact rankings and traffic for our own clients. This is the stuff that separates a website that looks professional from one that actually performs like a professional tool for your business.
So You’ve Launched. Now What?
Here is what most people don’t understand: everything we’ve covered in this article is the starting line, not the finish line. Having a properly optimized website at launch gives you a solid foundation, but if you stop there, you’re leaving a ton of growth on the table. The businesses that dominate search results aren’t just the ones with clean meta titles and fast load times. They are the ones that keep building on that foundation, week after week, month after month.
Here is where we typically steer clients after launch day:
- Developing a content marketing plan: Your website needs fresh, relevant content on a regular basis. Blog posts, case studies, resource pages. That is how you signal to Google that your website is active, authoritative, and worth ranking. We can help you develop a content calendar that targets the keywords and topics your audience is actually searching for, so every piece of content has a strategic purpose behind it. We don’t want content for the sake of having content. We want content that moves the needle forward. Learn more about content marketing here.
- Off-site SEO and link building: On-site SEO is you getting your house in order. Off-site SEO is how we build your reputation in the neighborhood. When other reputable websites link back to yours, it tells search engines that your content is trustworthy and worth recommending in search results. Let’s run some link-building campaigns that earn high-quality backlinks through real relationships, guest contributions, directory placements, and so on. No shady link farms. No spammy tactics that will get you penalized. Just legitimate, earned authority. Learn more about off-site SEO here.
- Ongoing monitoring and optimization: Search engines are constantly evolving their algorithms, your competitors are constantly updating their websites, and your audience's search behavior is always shifting. We keep an eye on your rankings, traffic patterns, and Core Web Vitals over time and make adjustments as the landscape changes. SEO isn't a set-it-and-forget-it deal. It's an ongoing commitment, and having someone in your corner who's watching the data makes all the difference. Learn more about on-site SEO here.
If you're launching a new website or wondering why your current one isn't pulling its weight in search results, we'd love to take a look. This is literally what we do every day at Storm Cloud Marketing. We build Webflow websites that are designed to be seen, not just admired.
Schedule a call with us and let's make sure your website is working as hard as you are.
Get started today!
Schedule your Intro Call with our team.


